
WordPress caching is essential to improve your website’s performance and serve your pages quickly to your users. However, after making changes to your site, your cached content can prevent you and your visitors from seeing these updates. Therefore, you might be asking yourself how to clear your WordPress cache quickly and easily.
Fortunately, it’s pretty straightforward to clear your WordPress cache. Using a plugin, hosting dashboard tools, or your browser, you can easily flush your cache and generate new copies of your website files that reflect your updates and changes.
In this article, we’ll explore some common reasons you might need to clear your WordPress website’s cache. Then, we’ll show you four easy ways to do it. Let’s get started!
When you might need to clear your WordPress cache
Your WordPress cache is a collection of saved static files. When a user visits your website, they’ll receive cached files rather than running heavy PHP scripts to request new versions of the website. With this setup, caching can help your WordPress site load more quickly for your visitors. In turn, this can improve the user experience and potentially boost your Search Engine Optimization (SEO) rankings.
However, there are times when you might want to clear your WordPress cache. For example, if you’ve recently updated your website’s content or design, you’ll want visitors to see those changes. Manually clearing the cache can generate new copies of your site’s files and show the updated version to users.
You’ll likely want to clear your WordPress cache regularly. This ensures that visitors will always see the newest content, such as comments and recent posts, when accessing your site. Therefore, we recommend purging the cache every 12-24 hours, depending on the frequency of your updates.
Additionally, clearing your cache is often the first step when troubleshooting WordPress errors and performance issues. Sometimes your cache stores outdated files that trigger error messages and prevent you from loading or using your WordPress dashboard or website.
How to clear the cache in WordPress
Clearing the cache in WordPress is a straightforward process. Let’s look at a few different methods you can use to remove cached files and generate new ones.
Method 1: Purge your browser cache
If you’d like to see changes to your website, you can start by clearing your browser’s cache. This method will purge any saved files and force WordPress to generate new copies to display the updated content. However, note that this method won’t change the cached files available to your readers.
This process differs slightly between browsers. In this tutorial, we’ll show you how to purge the cache with Google Chrome. If you use a different browser, you’ll want to follow these instructions for purging the cache.
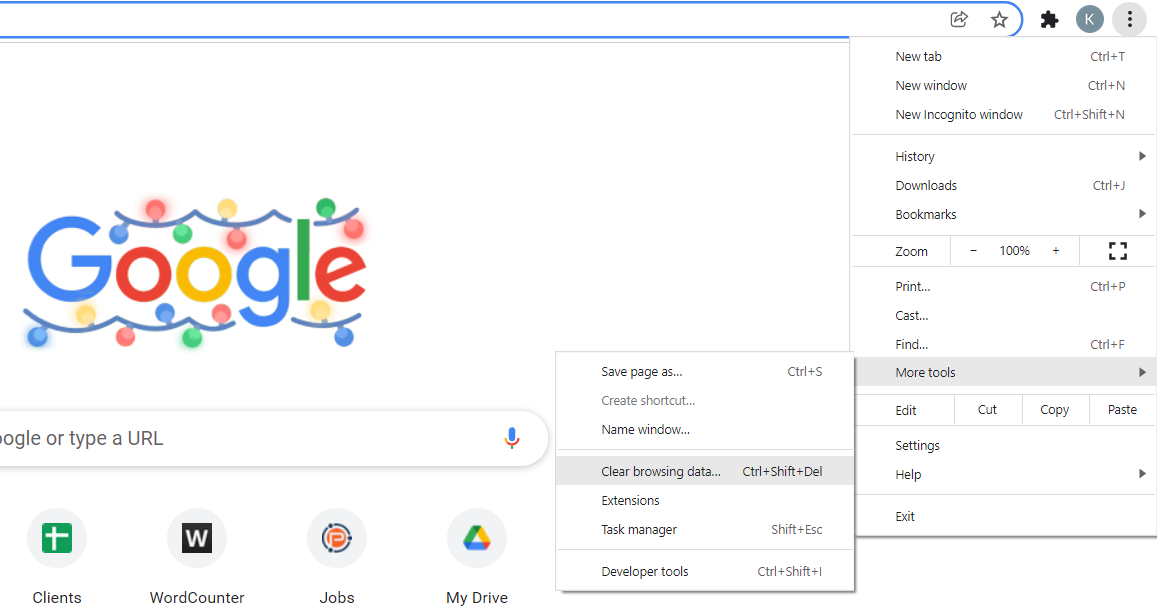
In Google Chrome, you’ll first need to click on the three dots in the top right corner of the browser window. Then, select More tools > Clear browsing data:
You’ll then see a popup window that enables you to clear different kinds of data. You’ll want to make sure that the box next to Cached images and files is checked:
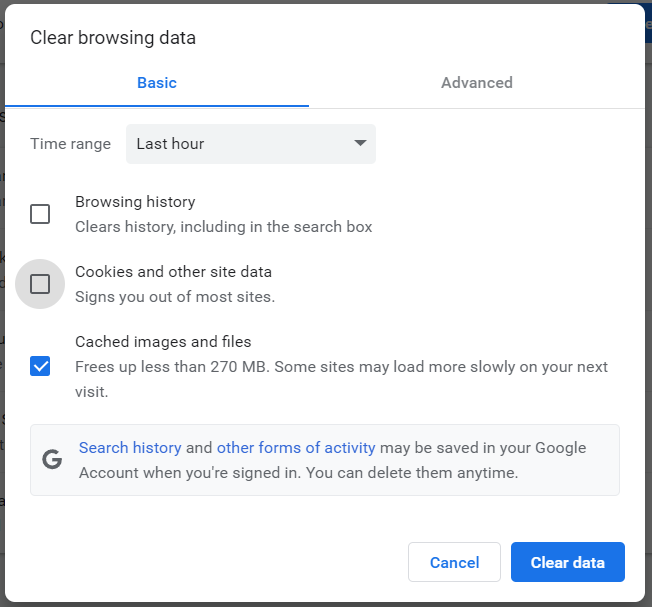
You can choose an interval from the Last hour to All time from the dropdown menu. Then, click on Clear data to purge the cache. Once you refresh your WordPress website, the browser will run all the PHP requests and serve the most recent version of your site.
Method 2: Clear the cache from your WordPress caching plugin
Using your WordPress caching plugin is one of the easiest ways to clear the cache. The process will differ depending on the specific tool you have on your website. However, the general steps involve accessing your plugin in the WordPress dashboard and manually purging the cache.
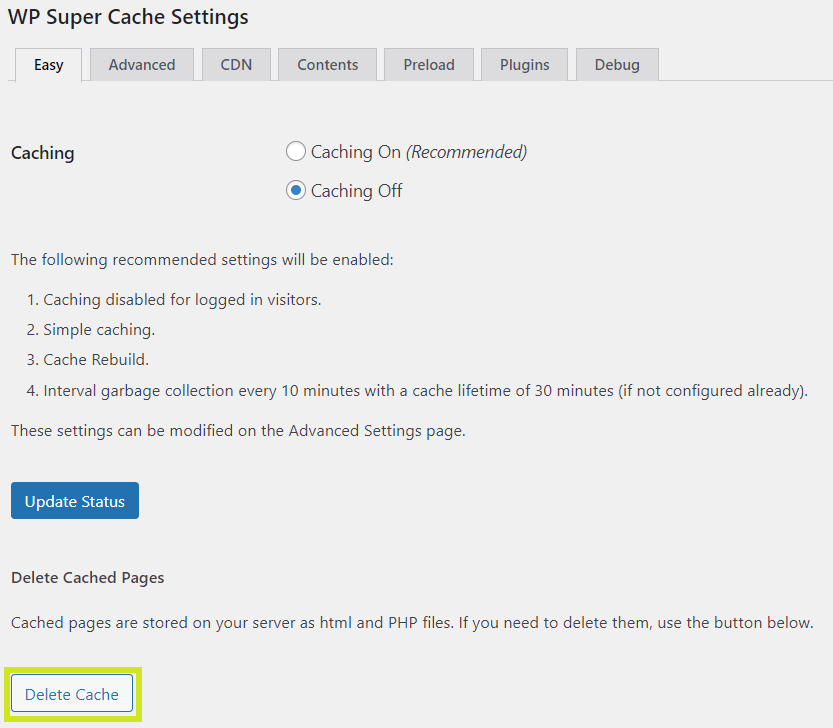
For example, if you use WP Super Cache, navigate to Settings > WP Super Cache and click on the Delete cache button underneath Delete cached pages:
This plugin also enables you to set up automated cache purges. Navigate to WP Super Cache > Advanced and scroll down to Expiry Time & Garbage Collection. Here, you can choose how long cached files will exist before the plugin clears them out and makes new copies of your website:
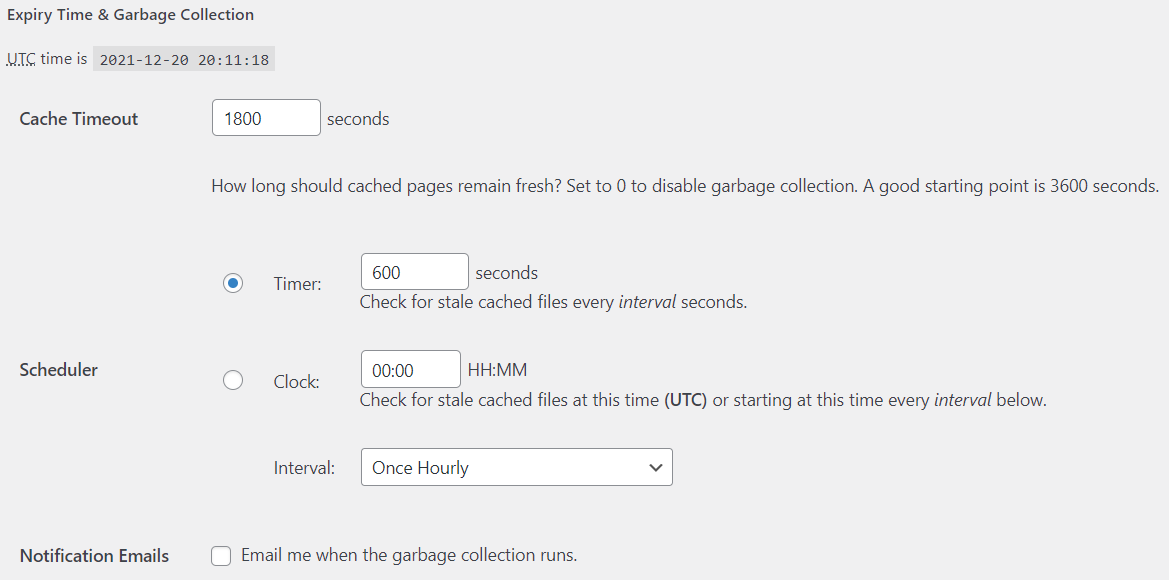
The default timeout for cached files with this plugin is 1800 seconds (30 minutes). However, if your website doesn’t update its content very frequently, you might like to increase this limit to between 12 and 24 hours. Alternatively, you can choose a particular interval from the dropdown menu or choose a cache clear-out time for each day.
Method 3: Clear the cache from your hosting dashboard
Alternatively, you can clear your WordPress cache from your hosting provider’s dashboard. There is usually a simple button that sits at the top of your WordPress dashboard, making this one of the easiest caching methods.
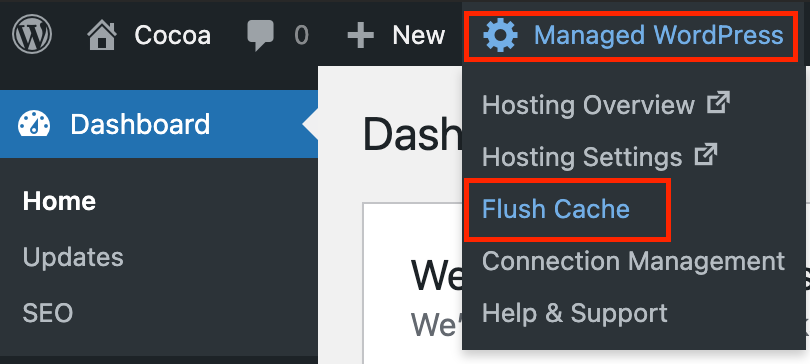
Again, this process will differ depending on your chosen host and the integrated caching solution it uses. For instance, if you use GoDaddy for example, you’ll want to click on Managed WordPress at the top of your dashboard. Then, select Flush Cache from the dropdown menu:
It’s that easy! Reload your WordPress website, and you should now see the newest version of it.
Method 4: Clear the Cloudflare cache
If you use Cloudflare.com then this also adds an additional caching level, so will also need to be cleared. You can do this from the overview page.

If you would prefer to manage this from your wp dashboard, try out the WP Cloudflare Super Page Cache plugin.
Conclusion
Clearing your WordPress cache enables you and your users to see the most updated version of your website. Fortunately, purging your cached files is a straightforward process.
To recap, you can clear your WordPress cache using any of the following tools:
- Your browser settings
- A WordPress caching plugin
- Your hosting provider’s dashboard
- Cloudflare
Recent Comments